We won’t get into the details of how to create an iOS project in Xcode.Although if you have any queries or you’re facing a difficulty in doing so, please write to us and we’ll be able to help you out. Moving on, let us check out how to integrate Google Tag Manager pod in your project.
Adding GTM to Xcode Project
Close Xcode project, open terminal, navigate to your root directory of your project and write below command. This will create a podfile in your project.
Open podfile and include Google Tag Manager pod in it.
Close podfile, and in terminal write below command to install the pod in your project.
Great! Google Tag Manager is installed in your project. Now open your project in Xcode using xcworkspace file.
Adding a Bridging Header File
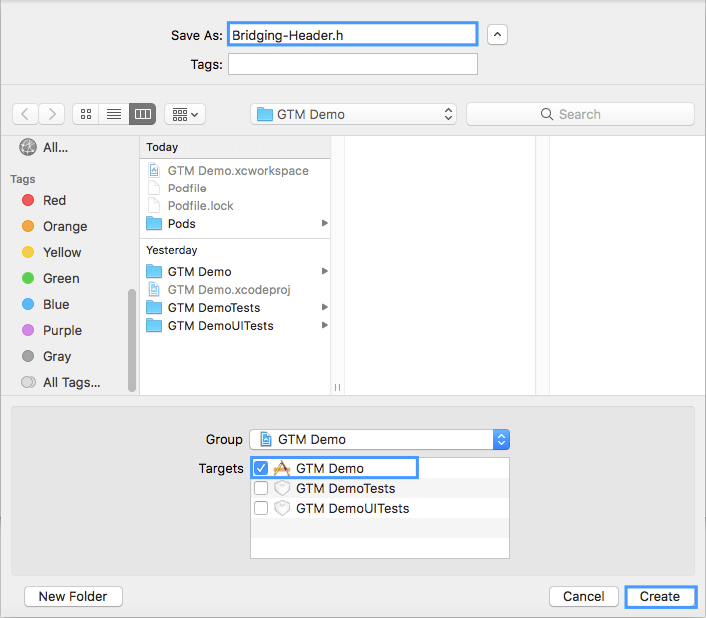
Create a bridging header file in your project. In Xcode, go to File -> New -> File, select Header File and create it within your target to keep it associated with your project files.
Open the file in editor and import below mentioned headers in it.
Add Objective-C bridging header to Build Settings. Go to Build Settings, select All and Combined and search for the bridging header. In the value field of key containing Objective-C Bridging Header, enter header filename Bridging-Header.h.
Adding a Default GTM Container
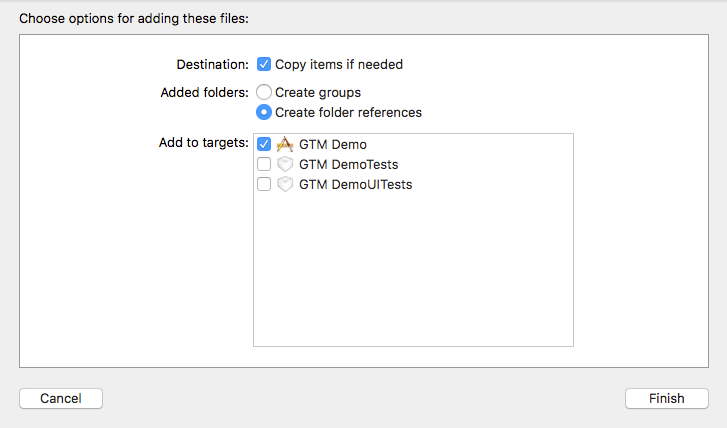
Go to the directory where you downloaded GTM container, drag downloaded container and drop it into your Xcode project. One window will pop up, select ‘copy items if needed’ checkbox and add container to your project’s main target.
Initializing GTM in Xcode Project
Open AppDelegate file and following changes in it.
Confirm to TAGContainerOpenerNotifier protocol.
Implement containerAvailable method.
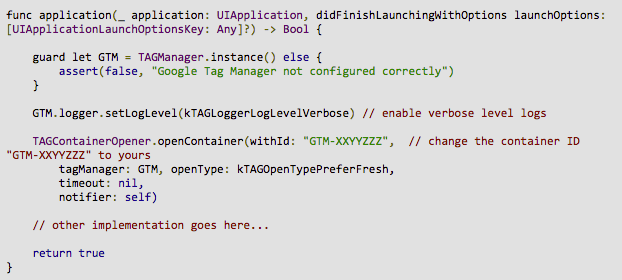
In didFinishLaunchingWithOptions method, add below code.
GTM is initialized in your app now. Let’s fire a screen view datalayer.
Tracking a Screen Open Event
Go to your main screen’s view controller file, from viewDidAppear method fire a dataLayer to push a screen view as shown below.
Viewing The Logs in Debug Area
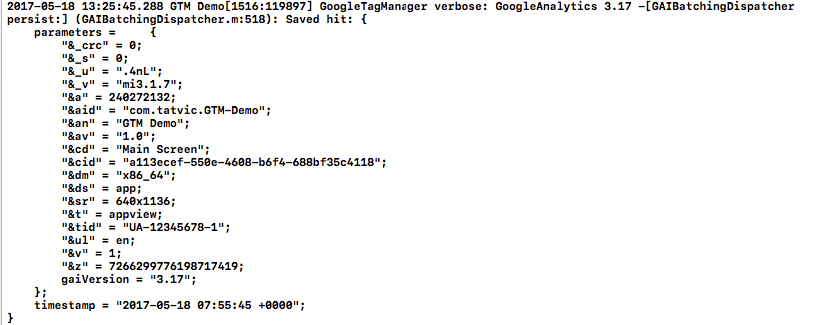
In Xcode, go to Product -> Run to build and run your project. Once the build runs on iOS device or simulator, you will see openScreen event being pushed in Debug Area as shown below.
Best Practices for Flawless Tracking
- Create one constant for UA ID in GTM and use it as tracking ID for all Universal Analytics Tags instead of hardcoding UA ID value in each Tag.
- It is best to push a screen view when screen actually appears to user hence push a screen view datalayer from viewDidAppear method.
- Google Analytics is case sensitive. If any letter case changes while pushing values to datalayer, Google Analytics will consider it as a different value and in reports it will appear in a different row. So it is best to keep all values in any pre-defined cases and use those same to push into datalayer every time.
Concluding Thoughts
Installing GTM library in Xcode project and initializing it with adding a default container is all you need to ensure track screen views, events and other tracking available through GTM. While adding a GTM pod in Xcode project, it is preferred to add a library of version ‘3.15.0’ to utilize datalayer functionality. If you have made any changes in the container, published it through GTM dashboard, then those changes will be reflected in the app within 12 hours of publishing that new container. It is not mandatory to include a container in app every time you publish a new version of it through GTM dashboard.
If you have any queries, comments or feedback for the post, please leave us a comment in the section below. Our team shall be sure to get back to you.


