Accelerated Mobile Pages (AMP) are not a new concept. You must have heard about it, and worked on implementing it for your website as well in the last year and a half. For all those who are still discovering AMP, let me give you a very brief idea of what it exactly is. AMP is an open-source technology that allows your website’s static content to be rendered instantly on mobile devices. In simpler language it means that this technology is basically a stripped-down form of HTML that is meant to help the mobile pages load really fast, improving the user experience on mobile.
What makes it so fast? That is something that a lot of digital marketers and companies have talked about. Moz has done a great job explaining all that you need to know about AMP in one of their Whiteboard Fridays.
At the Google I/O 2017 conference, Google announced that more than 2 billion AMP pages have been published by 900,000 domains and these pages are now loading twice as fast resulting in a significant improvement in the traffic as well as the conversions.
Measuring the performance of such pages to be able to make constant improvements and derive actionable insights is critical and hence, in this blog post, we are going to focus on setting up the tracking of these Accelerated Mobile Pages in Google Analytics.
AMP & Google Analytics:
AMP allows us to track user activity in google analytics through the amp-analytics tag. You can track your AMP pages and user actions accurately in Google Analytics with and without GTM. The post is therefore further divided into the following two parts:
-
Using AMP analytics library [Without GTM]
-
Using GTM for Tracking AMP [With GTM]
Using AMP analytics library [Without GTM]
AMP doesn’t support javascript and so we, unfortunately, cannot use the analytics.js library to track AMP pages. Although, we can use the amp-analytics library which is provided by amp project.
<script async custom-element=”amp-analytics” src=“https://cdn.ampproject.org/v0/amp-analytics-0.1.js“></script>
Let us take a look at basic pageview tracking setup and event tracking setup for AMP pages in Google Analytics without any dependency on GTM:
1. Basic page view tracking:
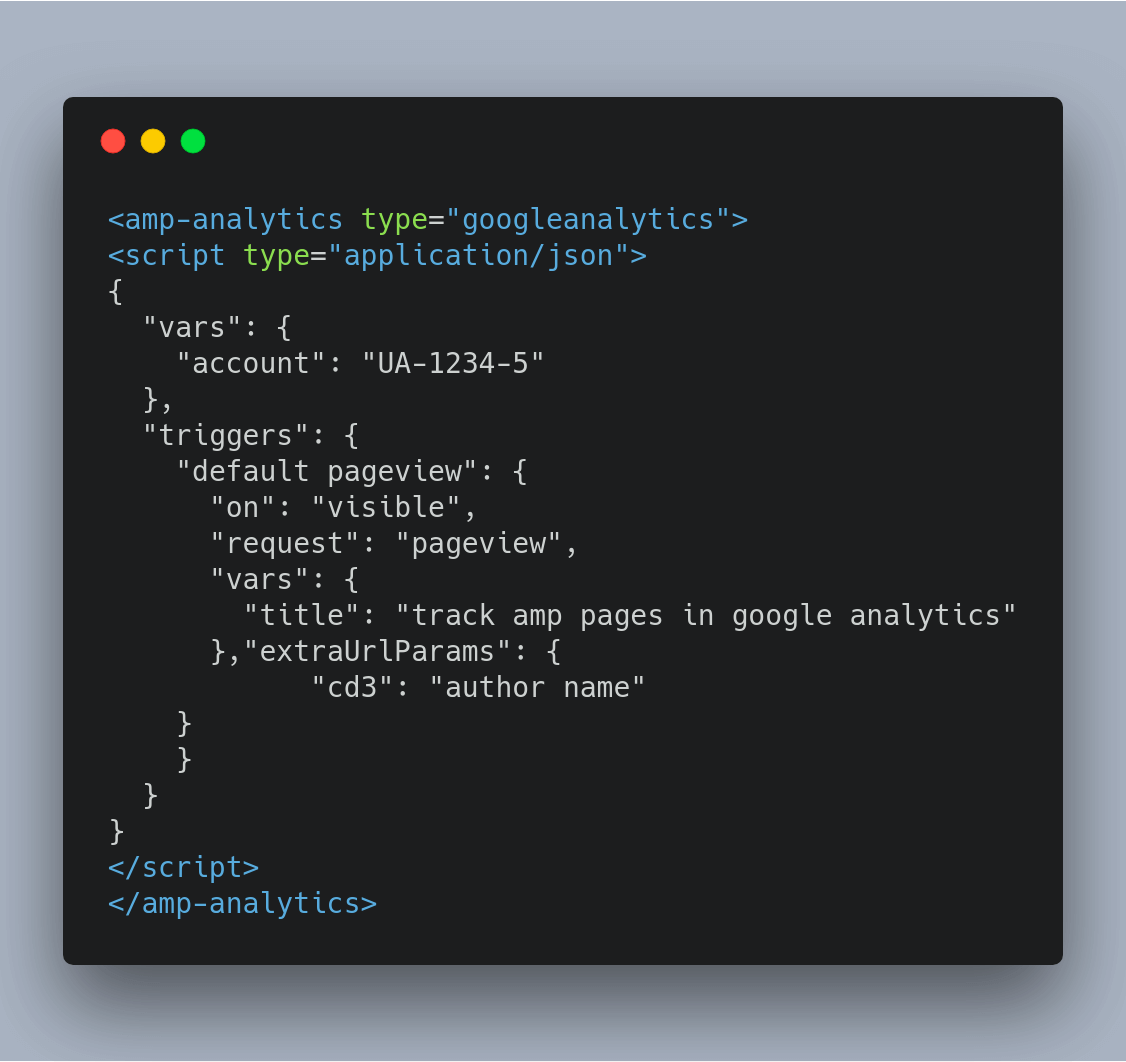
To implement basic pageview tracking, the following code needs to be implemented on all the AMP pages:
The above-given snippet should be implemented after the AMP analytics library code snippet. All you have to do is insert the property id of your Google Analytics and the page title value in the snippet. Once this tracking code is set up, your basic pageview tracking is implemented and you can start analyzing the basic performance of your AMP pages.
Additional tip: We can also take advantage of custom dimensions in Google Analytics for tracking AMP pages.
For e.g, I want to pass the author’s name with every pageview. As we do normally in Google Analytics, using the index value of Custom Dimension, we can start capturing the author name as desired. In the below-given code replace the author’s name with the actual author’s name.
2. Event tracking:
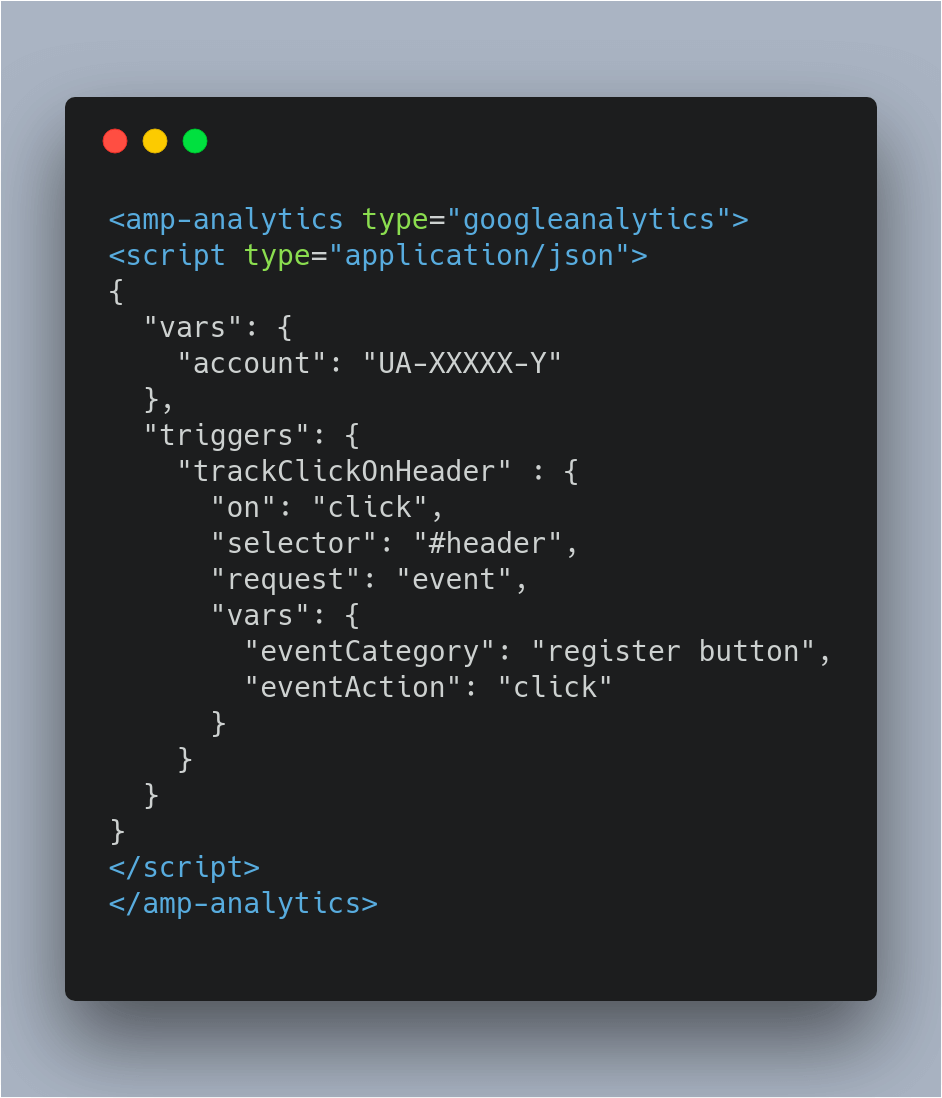
Custom event tracking allows us to track detailed user behavior on the AMP Pages. To track events in AMP, use the tracking code given below:
Define the eventCategory and event action values as per your reporting requirements that you are looking to track in your Google Analytics. Furthermore, we shall also have to replace the
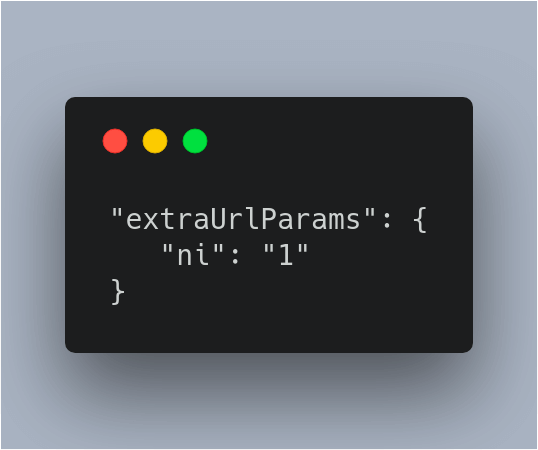
value of selector with CSS selector of that specific element which we want to track and if you want to track multiple elements, you can do so by inserting selectors with semicolons. We can also send noninteractive events in Google Analytics while setting up the tracking for AMP pages. To do so, we need to add the below JSON in the JSON of event tracking right after the vars key:
Using GTM for Tracking AMP Pages:
To get started, create a new container for AMP in Google Tag Manager.
Now, to add GTM on the amp, we need to install two code snippets on all amp pages as you can see in the screenshot below:
Now, let us take a look at the basic pageview tracking setup and event tracking setup for AMP pages in Google Analytics with Google Tag Manager.
1. Basic page view tracking:
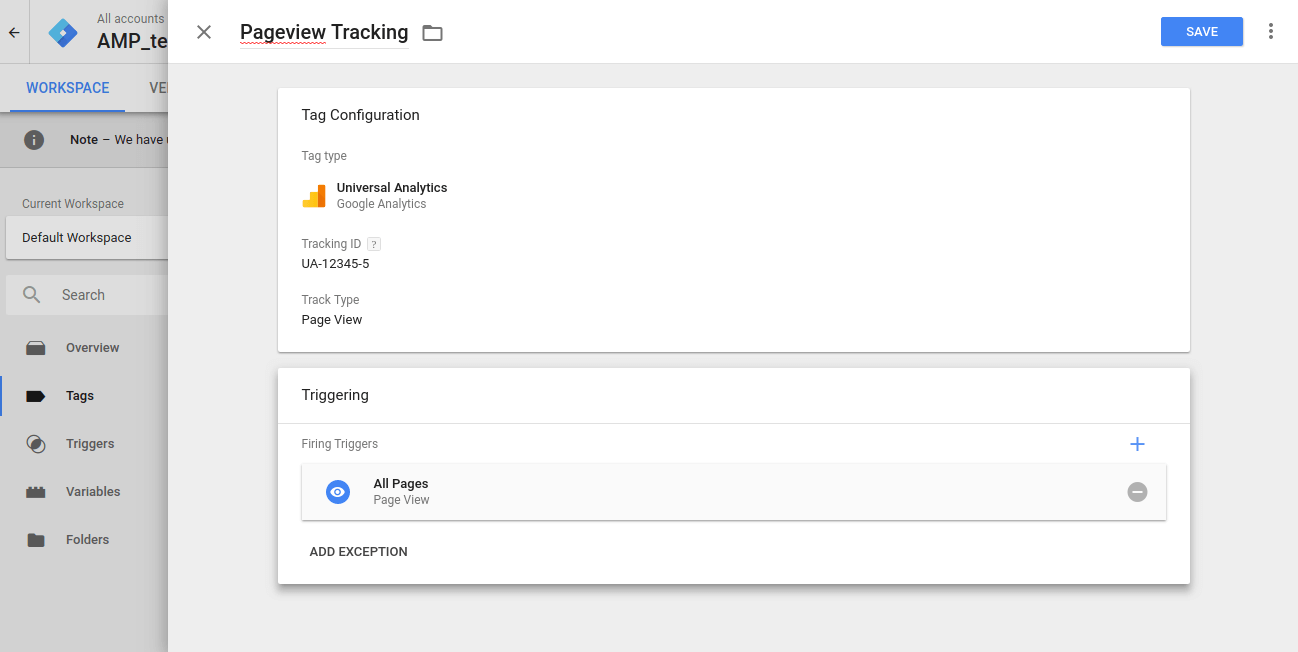
Connect a GTM tag with addition of the GTM code to start with pageview tracking as shown in the screenshot below:
Add your Google Analytics property ID as the tracking ID in the UA tag. Add default All Pages pageview trigger as a trigger of this pageview tag and voila, you are all set to start tracking the AMP pages with the help of Google Tag Manager
2. Event tracking:
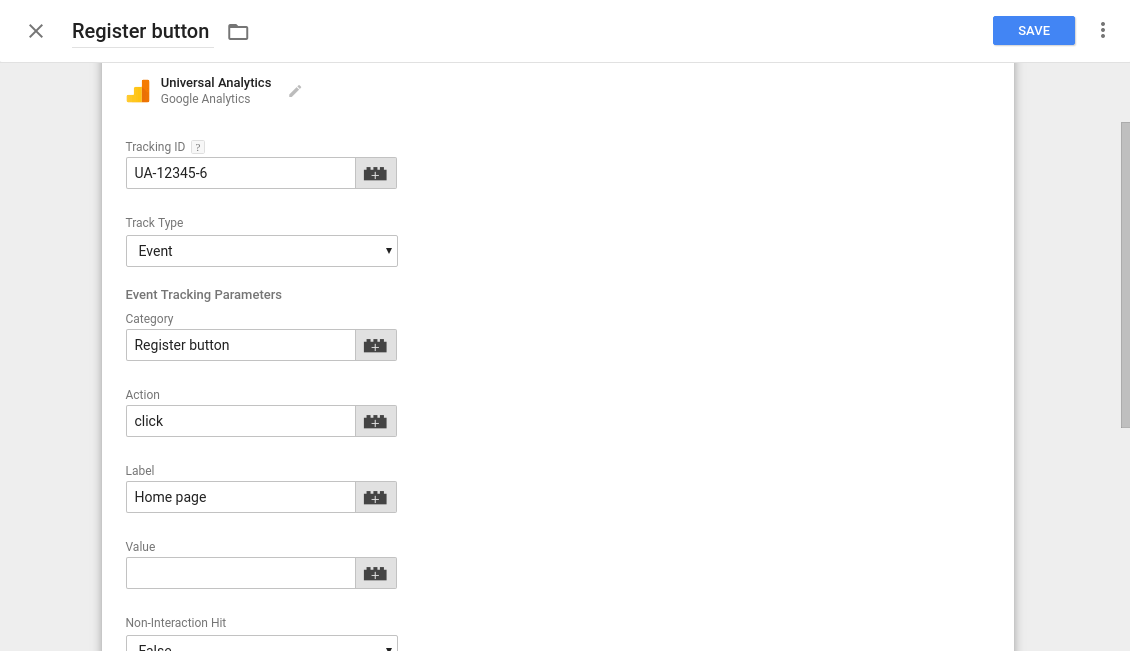
Event tracking on the AMP page is the same as the normal page event tracking. We just need to configure one UA tag with track type as event and have to provide category, action, and label for same.
Going further, we need to add a trigger to be able to send event data in Google Analytics and set triggers like click trigger, scroll trigger, and visibility of elements so as to successfully fire this event tag.
By creating and adding triggers as per your tracking requirements, the tags will start sending data to Google Analytics when the trigger conditions are met.
Conclusion:
We’ve covered the basic implementation of tracking AMP Pages in Google Analytics. Over the next couple of weeks, we will be focusing on various analytics quick hacks and advanced AMP tracking in Google Analytics and the benefits of doing so, with a series of blogs. So stay tuned to this space to read up more on this topic.
If you are facing any issues in setting up your AMP tracking in Google Analytics or if there is a topic in particular that you’d like us to cover in our series of blogs on AMP tracking in Google Analytics, please feel free to let us know in the comment section below.


